はじめに
Stable Diffusionはとても便利で、手軽に画像生成をローカルで行うことができます。
しかし、pythonで駆動しているために、他のプログラムやプロジェクトに組み込む際には困る場面もあります。
私は趣味でゲーム開発をしているのですが、ゲームエンジン内で画像生成を利用したいと感じる場面は多々あります。しかし、既存のゲームエンジン(Unity, UnrealEngine, Godotなど)では、pythonでプログラムを記述することはできないため、上記のStable Diffusionは利用できません。
そこで今回は、stable-diffusion.cppというプロジェクトを使って、pythonに依存せずに画像生成が動作することを確かめたいと思います。

ライセンスはMITライセンスなので商用利用も可能です(モデルのライセンスは別途ご確認ください)。
使ってみる
セットアップ
まずは上記のURLのUsageに従って、プロジェクトをコンパイルします。
gitからプロジェクトをクローンします。
git clone --recursive https://github.com/leejet/stable-diffusion.cpp
cd stable-diffusion.cpp
cmakeを使ってビルドします。cmakeがない人はインストールしてください。
mkdir build
cd build
cmake ..
cmake --build . --config Release
BLAS系の数値計算ライブラリがあればより高速に動作できます。その場合は、cmakeのオプションを変更します。詳細は上記のURL中のBuildの節を見てください。
コンパイルが完了すると、
stable-diffusion.cpp/build/bin/Release/sd.exeが作成されます。これに引数を与えれば、Stable Diffusionが実行できます。
モデルのダウンロード
buildディレクトリから抜けて、直下にmodelディレクトリを作ります(相対パスが合っていれば良いので、どこでもいいです)。
modelsディレクトリへ移動し、オリジナルのモデルをダウンロードします(LoRaを使う場合は、別のモデルを別途ダウンロードしてください)
Stable Diffusionのオリジナルモデルはバージョンがたくさんあります。
v2.1やSDXLの方が高画質で、高品質なものが作れますが、バージョンが上がる毎にモデルサイズが大きくなるため、v1.5を使います。
mkdir models
cd models
curl -L -O curl -L -O https://huggingface.co/runwayml/stable-diffusion-v1-5/resolve/main/v1-5-pruned-emaonly.safetensors
実行
buildディレクトリにて、次のコマンドを実行します。
.\bin\Release\sd.exe -m ..\models\v1-5-pruned-emaonly.safetensors -p "a lovely cat"実行するとログが流れて計算が始まります。
与える引数についても解説してありますが、ここにも載せておきます。
usage: ./bin/sd [arguments]

arguments:
  -h, --help                         show this help message and exit
  -M, --mode [MODEL]                 run mode (txt2img or img2img or convert, default: txt2img)
  -t, --threads N                    number of threads to use during computation (default: -1).
                                     If threads <= 0, then threads will be set to the number of CPU physical cores
  -m, --model [MODEL]                path to model
  --vae [VAE]                        path to vae
  --taesd [TAESD_PATH]               path to taesd. Using Tiny AutoEncoder for fast decoding (low quality)
  --control-net [CONTROL_PATH]       path to control net model
  --embd-dir [EMBEDDING_PATH]        path to embeddings.
  --stacked-id-embd-dir [DIR]        path to PHOTOMAKER stacked id embeddings.
  --input-id-images-dir [DIR]        path to PHOTOMAKER input id images dir.
  --normalize-input                  normalize PHOTOMAKER input id images
  --upscale-model [ESRGAN_PATH]      path to esrgan model. Upscale images after generate, just RealESRGAN_x4plus_anime_6B supported by now.
  --upscale-repeats                  Run the ESRGAN upscaler this many times (default 1)
  --type [TYPE]                      weight type (f32, f16, q4_0, q4_1, q5_0, q5_1, q8_0)
                                     If not specified, the default is the type of the weight file.
  --lora-model-dir [DIR]             lora model directory
  -i, --init-img [IMAGE]             path to the input image, required by img2img
  --control-image [IMAGE]            path to image condition, control net
  -o, --output OUTPUT                path to write result image to (default: ./output.png)
  -p, --prompt [PROMPT]              the prompt to render
  -n, --negative-prompt PROMPT       the negative prompt (default: "")
  --cfg-scale SCALE                  unconditional guidance scale: (default: 7.0)
  --strength STRENGTH                strength for noising/unnoising (default: 0.75)
  --style-ratio STYLE-RATIO          strength for keeping input identity (default: 20%)
  --control-strength STRENGTH        strength to apply Control Net (default: 0.9)
                                     1.0 corresponds to full destruction of information in init image
  -H, --height H                     image height, in pixel space (default: 512)
  -W, --width W                      image width, in pixel space (default: 512)
  --sampling-method {euler, euler_a, heun, dpm2, dpm++2s_a, dpm++2m, dpm++2mv2, lcm}
                                     sampling method (default: "euler_a")
  --steps  STEPS                     number of sample steps (default: 20)
  --rng {std_default, cuda}          RNG (default: cuda)
  -s SEED, --seed SEED               RNG seed (default: 42, use random seed for < 0)
  -b, --batch-count COUNT            number of images to generate.
  --schedule {discrete, karras, ays} Denoiser sigma schedule (default: discrete)
  --clip-skip N                      ignore last layers of CLIP network; 1 ignores none, 2 ignores one layer (default: -1)
                                     <= 0 represents unspecified, will be 1 for SD1.x, 2 for SD2.x
  --vae-tiling                       process vae in tiles to reduce memory usage
  --control-net-cpu                  keep controlnet in cpu (for low vram)
  --canny                            apply canny preprocessor (edge detection)
  --color                            colors the logging tags according to level
  -v, --verbose                      print extra info
量子化
モデルが大きすぎる場合には量子化します。
例えばオリジナル(f32)をq8_0へと変換する場合は次のコマンドになります。
.\bin\Release\sd.exe -M convert -m ..\models\v1-5-pruned-emaonly.safetensors -o ..\models\v1-5-pruned_q8_0.gguf -v --type q8_0量子化の比較
量子化した場合の実行速度やメモリの使用量についてまとめておきます。メモリの使用量はタスクマネージャーを参考にしました。
実行マシンのスペックは i7-5960X(8core)です。最近のPCのi3ぐらいの性能です。
| name | speed | memory size | disk size |
|---|---|---|---|
| f32(original) | 470.57 sec | 2.84 GB | 3.97 GB |
| f16 | 480.25 sec | 2.33 GB | 1.98 GB |
| q8_0 | 453.69 sec | 2.09 GB | 1.64 GB |
| q5_0 | 491.88 sec | 1.99 GB | 1.50 GB |
| q4_0 | 471.83 sec | 1.96 GB | 1.45 GB GB |
正直言ってめちゃめちゃ遅いです。1枚生成するのに8分ほどかかりました。
次に、生成された画像の比較をします
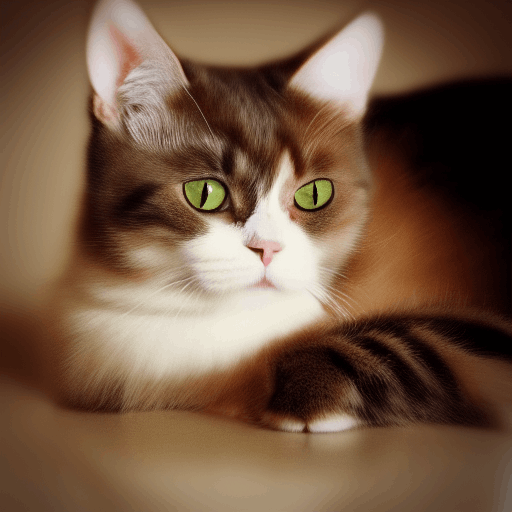
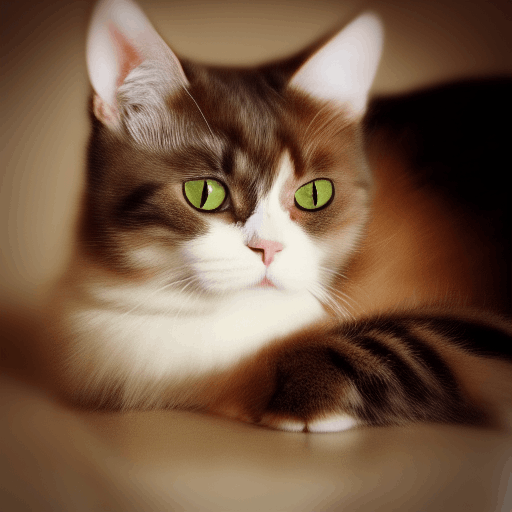
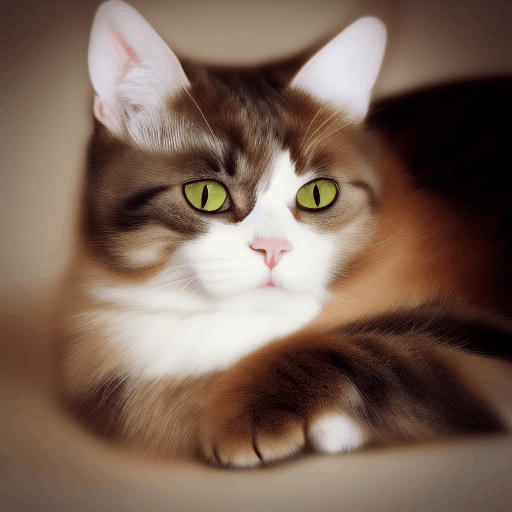
※seedは同じです
f8_0までは全体像はほぼ変わりません。よく見ると細部が描画されなくなっていることがわかりますが、遠目ではわかりません。
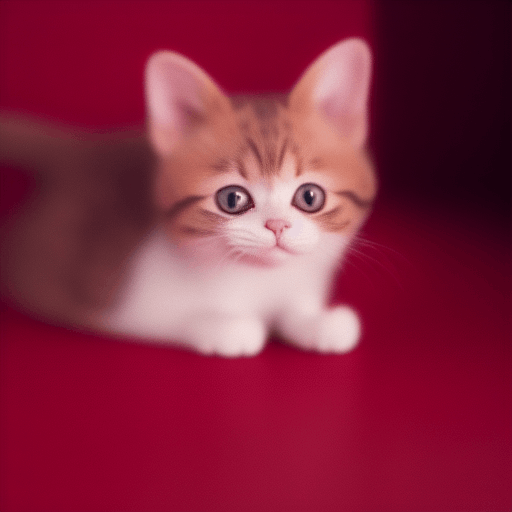
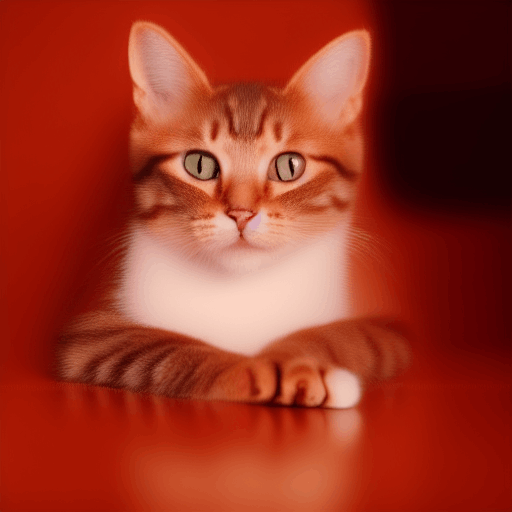
q5からはだいぶ情報が落ちた画像がでてきました。子猫になっていますし、なぜか全体的に赤いです。
対応している拡張機能
READMEには次のような高速化・拡張機能に対応していると書かれています。
- LCM-LoRa
- 数ステップで画像生成する手法
- TAESD
- エンコーダーとデコーダーを改良して軽量化する手法
- ESRGAN
- アップスケールする手法
- Photomaker
- 同じ顔で違う生成画像を作る手法
- Control-Net
- 人物のポーズを指定できる手法
逆に、これ以外の(web-uiなどで使える)拡張機能は使えないということです。
感想
stable diffusionをc++でコンパイルして実行ファイル形式にできるのは便利。
しかし、CPU環境だと生成速度はかなり遅いので用途は限られそう。
pyinstallerを使ってweb-uiなどのpythonプロジェクトを実行ファイルに変換する方が、拡張性は高いような気がしました。